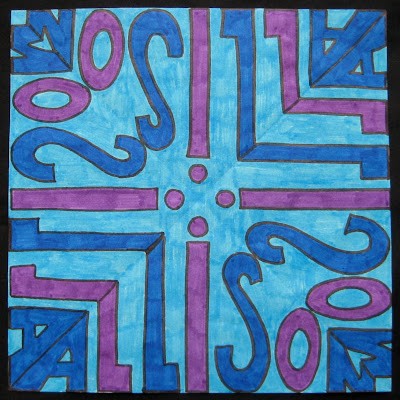
Kaleidoscope Name Design


Materials:
- 2 square pieces of paper the same size (copy paper usually works well)
- Pencil and eraser
- Scissors
- Black “F” Sharpie
- Colored pencils or markers
Directions for lower grades:
1. First, fold both of your papers in half diagonally, then in half again. Unfold both of them and set one aside.
2. Cut out one of the triangles created by your fold lines on just one of the papers.
3. With the flat edge along the bottom and the point facing up, write your name with large stick letters so that it fills the entire triangle.
4. Now, draw an outline around your stick letters to make nice, thick letters that touch all three sides of your triangle. Trace over your pencil lines with Sharpie.
5. Next, place the triangle with your name on it under one of the corresponding triangles on the other paper. Trace your outline letters with pencil onto the new paper. (It can be helpful to use a light box or even tape your papers to a window for tracing. You could also try using a more translucent paper if it’s difficult to see your lines, although cheap copy paper works great for me.)
6. Continue tracing your name onto each section, flipping your name over every other time to achieve a “mirror image”. (Flipping your name over every other time is essential to achieving a mirror image, so don’t forget this important step!!)
7. Then, trace over all your pencil lines with Sharpie.
8. Color with markers or colored pencils.
No comments:
Post a Comment